Sorry I haven't been updating the page this week. After wrapping up the Crochet Pin-Along this week, I jumped into a couple of quick projects I needed to get done.
We've been looking at our calendar for the summer, because there are a couple of places we wanted to take the kids for day trips. One that's been on my mind is visiting one of my favorite parks from when I was a child, StoryLand. With our family commitments coming up (and pretty much lasting the rest of our weekends this summer) we decided we would try for this weekend.
One project that I haven't been able to complete yet is a special 'dress up' item for each of the kids to wear when we go to StoryLand (trying to cut down on souvenir purchasing). If I am able to complete that project before we go, you will definitely see a post about it.
The second project that I am super excited I finished last night was derived directly from Pretty Prudent (Thank you, Pretty Prudent!). I made each of the boys their own drawstring backpacks to wear when we get to the park that they can keep their own water bottle in, and any other trinkets they acquire while we are there. The drawstring backpacks were perfectly toddler sized, and if they don't want to carry them, they will easily fit into the diaper bag or on the handles of the stroller.
This was one of the easiest to follow tutorials I've worked with! Due to this, I did not take process pictures of my beginning and procedural steps since the blog and tutorial has everything you need to craft your own toddler drawstring backpack.
I wanted to share with you a few notes, and my completed pictures!
I used only what I had on hand - which meant some denim fabric that measured an inch smaller than the required 26", and blue single fold bias tape and a thin, green broadcloth. With the green broadcloth, I crafted my own bias tape (seaming tape) by cutting two 44" x 2" strips. I ironed a crease going lengthwise, then folded in the two raw edges into the fold and ironed flat. I decided to make my two strap lengths 44" rather than 36" because my kids seem tall to me (and I was glad I did this because the straps are perfect this way). I thought the blue bias tape I had was double fold which is why I made the green double fold, but it wasn't. This required me to sew the two flaps down on the blue bias tape.
When I stitched the green tape together, I also stitched it in two rows (more for decoration) so it matched the blue. (Since they are twins, I feel if I do for one, I should do for the other! Not that they would notice but I would.).
These are the finished bags from last night:
This is the boys trying them on this morning. I was so pleased with the fit! I will definitely make these bags again.
Welcome to my Blog! I am here to share with you my ideas, some patterns and a love of all things crafty.
Showing posts with label accessory. Show all posts
Friday, June 28, 2013
Friday, June 14, 2013
Project: Toddler Watch
This post contains links to items I used in the activities described. I get commissions for purchases made through links in this post. I was not paid by these brands nor did I receive goods or payment to recommend the products, they are just the products I chose for the project.
I had mentioned in my first post that I love pretend play and watching my children in their pretend play. This project was designed when my boys developed a fascination with my jewelry. I don't wear much, my wedding and engagement rings, a watch, a bracelet and sometimes earrings. My watch has a button on it that will illuminate the face in the dark, and once the boys discovered this, I couldn't get them away from my wrist; until I made them their own watches.
I honestly made these about three months ago, and they have been machine washed at least a dozen times. They take them to Grammy's house, and wear them around the house and any time we go to a store. They love having things that make them like mom and dad, so these watches are an important part of their wardrobes and pretend play.
Introducing: Project Crocheted Toddler Watch
Craft: Crochet
Materials:
Directions:
Row 2: Ch 2, turn. HDC in same st and in each of next 3 HDC. (4 HDC)
Row 3 - 17: Repeat Row 2 until entire piece measures about 7" (see picture). For me, this was 17 rows of HDC. Yours may be different depending on the yarn or gauge you use. Fasten off, weave in ends.
There you have it! A new watch for your tot to put on and off themselves, one that is washable if it gets dirty, and that is very durable. Also, very easy to make a duplicate if it happens to be left at Grammy's. Make them in all colors so your little one can coordinate with their clothing or just make one in their favorite color!
Happy crafting!
I had mentioned in my first post that I love pretend play and watching my children in their pretend play. This project was designed when my boys developed a fascination with my jewelry. I don't wear much, my wedding and engagement rings, a watch, a bracelet and sometimes earrings. My watch has a button on it that will illuminate the face in the dark, and once the boys discovered this, I couldn't get them away from my wrist; until I made them their own watches.
I honestly made these about three months ago, and they have been machine washed at least a dozen times. They take them to Grammy's house, and wear them around the house and any time we go to a store. They love having things that make them like mom and dad, so these watches are an important part of their wardrobes and pretend play.
Introducing: Project Crocheted Toddler Watch
Craft: Crochet
Materials:
- Leftover yarn - just reach into your scrap yarn. I use two colors, white for the "face" of the watch and another color for around the face and the band.
- I use the H hook to give smaller, tighter stitches, but gauge is not essential to this project as you will make it to fit your child.
Abbreviations:
Magic Loop (ML)
Single Crochet (SC)
Half Double Crochet (HDC)
Double Crochet (DC)
Slip Stitch (Sl St)
Stitch (St)
Directions:
With face of watch color:
Magic Loop. (Check out this video from Crochet Geek if you need a tutorial)
Round 1: In ML chain 2. (Does not count as DC). 12 DC in ML. Sl St to first DC to join. Fasten off. (12 DC)
Magic Loop. (Check out this video from Crochet Geek if you need a tutorial)
Round 1: In ML chain 2. (Does not count as DC). 12 DC in ML. Sl St to first DC to join. Fasten off. (12 DC)
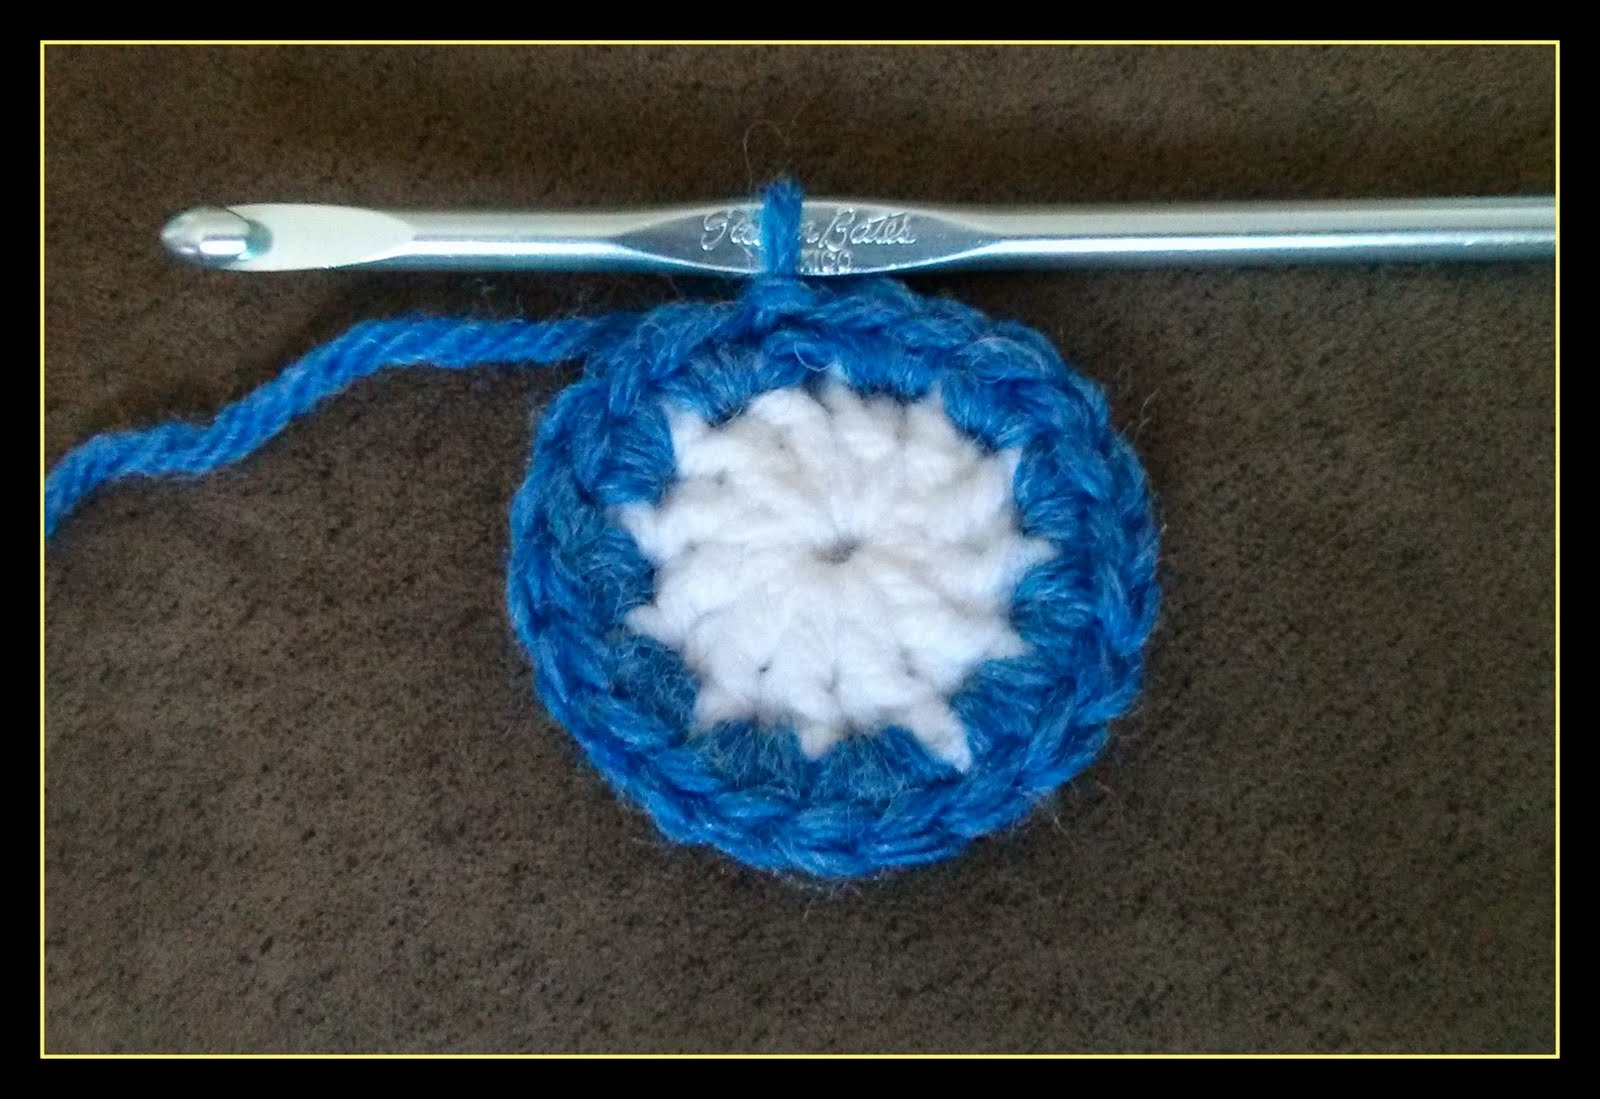
Round 2: Join new color for around face and band.
2 SC in each DC. Join with sl st to first SC. (24 SC)
Begin working the band.
Row 1: Ch 2. HDC in same st and in each of next 3 SC. (4 HDC)
Row 2: Ch 2, turn. HDC in same st and in each of next 3 HDC. (4 HDC)
Row 3 - 17: Repeat Row 2 until entire piece measures about 7" (see picture). For me, this was 17 rows of HDC. Yours may be different depending on the yarn or gauge you use. Fasten off, weave in ends.
Finishing
With wrong side facing, leave seven stitches on either side of the band around the face, sew open band end onto watch face in four remaining stitches.
There you have it! A new watch for your tot to put on and off themselves, one that is washable if it gets dirty, and that is very durable. Also, very easy to make a duplicate if it happens to be left at Grammy's. Make them in all colors so your little one can coordinate with their clothing or just make one in their favorite color!
Happy crafting!
Subscribe to:
Posts (Atom)