After some scrubbing, the kids are enjoying their new playset. I brought up all the play food my mom had kept from when I was a kid, and this honestly occupies the three year old twins and our 15 month old for extended periods of time. The food we kept stored in a bin, since one of the drawers was missing from our new kitchen, and all the food didn't fit on the shelves.
This is where my brainstorm for today's activity began.
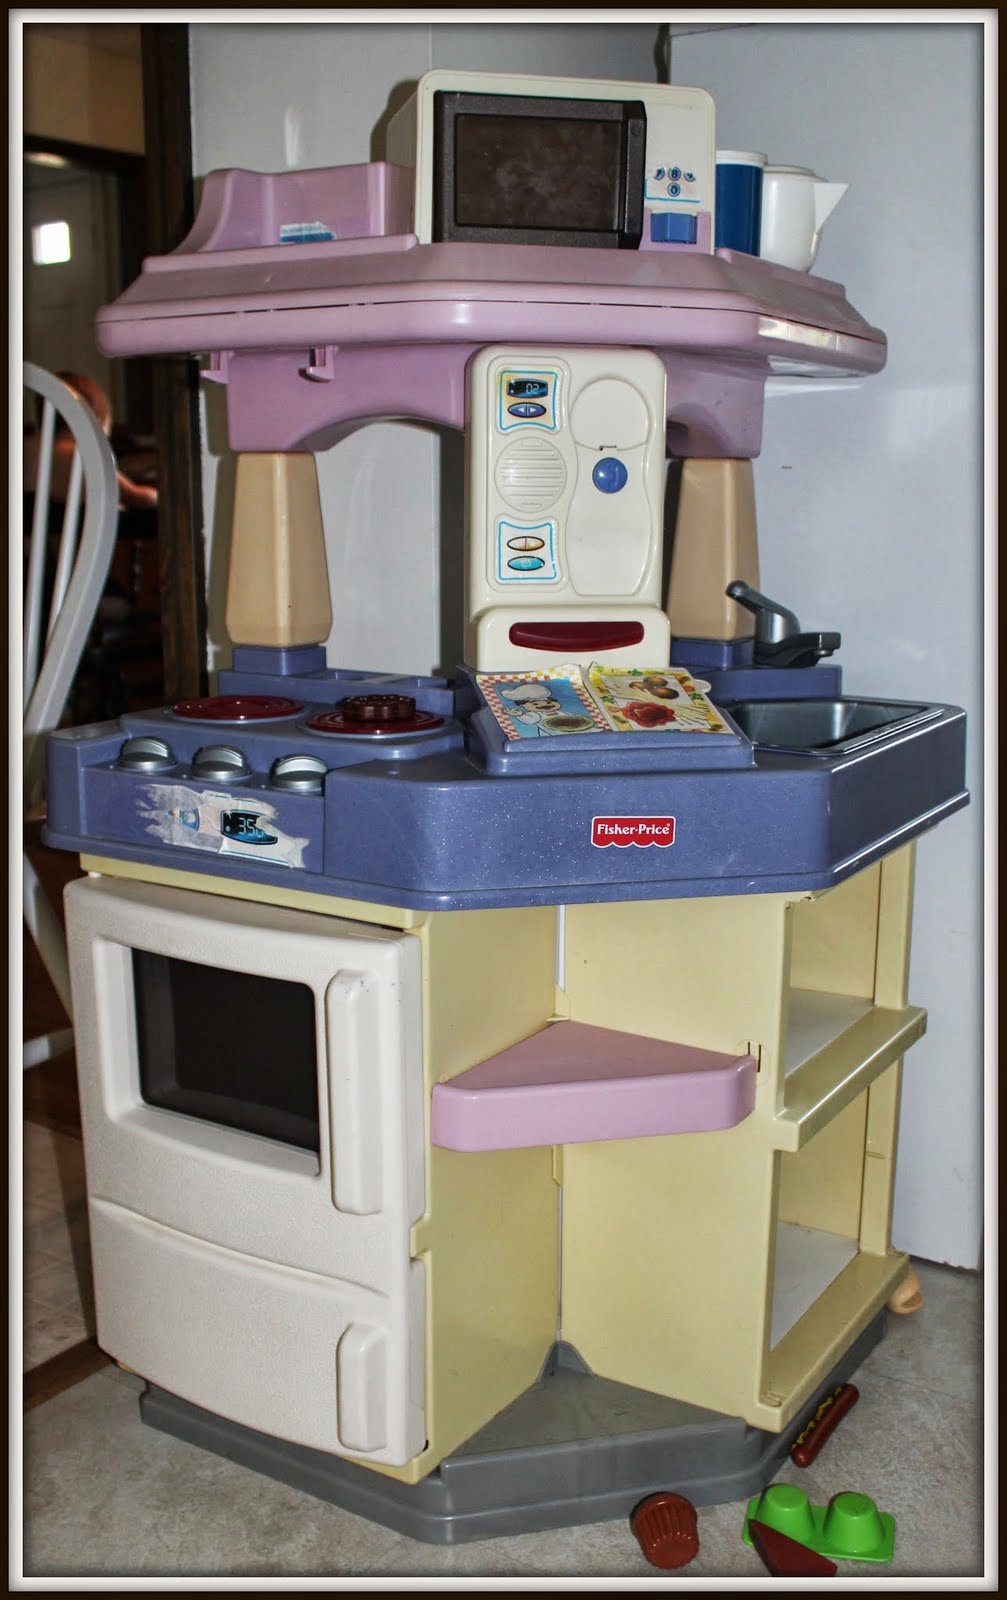
This is our awesome new kitchen:
This is what my floor looks like when the kids are done playing:

See the big empty bin? I don't really want to keep the kitchen set and the bin out since they are currently residing on our main living floor. I wanted to eliminate the use of the bin altogether.
I didn't take pictures of my first few steps, because it didn't occur to me to include this on my blog until after we had begun the project, so you'll have to imagine the first few steps.
Materials:
Frosted Flakes Double Sized Box - we got this from our cereal purchase at BJ's Wholesale Club.
Scrapbooking Paper (because I have it laying around, and it's 12"x12")
Exact-O Knife
Paper Cutter
Ruler
Scissors
Glue Stick (I used the kids')
Glue Gun and Glue Sticks (mine are from my dollar store)
Optional Materials (I did this because I had the materials on hand)
Eyelet Punch
Eyelets
Ribbon
Tapestry Needle

I started by measuring the two shelves I was planning on using the bin with. From that, I was able to cut two boxes from the same Frosted Flakes box (using the top as one box, and the bottom as a second). My shelves were different sizes, but I made both boxes the same so I could get two from one cereal box. I cut the top and bottom of the cereal box to the 6" height I needed.
I then cut the scrapbooking paper with my paper cutter so that it measured a full inch taller than I needed, and about an inch wider than I needed. In retrospect, if I make this project again, I will make it two inches wider so there is an extra inch on either side. Because my box measured over 10" on one side, and 6" on the short side, I needed four pieces (one for each face) per box.

I then set the kids to work putting glue on the back of the side pieces first. I even got the baby in on smacking the paper once it was placed to help stick it to the cereal box. (I didn't get any pictures of my other son helping)

At the top, I used the scissors to cut a small slit at each corner.


I repeated these steps to finish the other side.

I then did the exact same thing to the front and back of the box.

I repeated the whole thing for my second box!

Then I decided to add the handles. This is where I gathered my "optional" materials. I went with what I had on hand.

I first decided where I was going to poke the holes for my ribbon handles. After looking at my box front and back, I decided I would make the handle two and a half inches from each edge and two inches from the top.

On the inside, I measured and marked where I would punch my holes with my ruler and a pencil.


Then I used my eyelet punch to poke the holes for my eyelets:

I inserted my eyelets and secured them using my eyelet punch tool.
I did this on both the front and back of each of my boxes.

Then I cut some ribbon and threaded it through the eyelet holes using the tapestry needle.

I had to quadruple knot the back of the ribbon so the kids won't pull it out when they use the handles.


The bins look great!

And during nap time, I put all the food away in the kitchen, and was able to remove the bin from my living area! Everything now has a home!

The kids got a kick out of helping, and I showed them how to use the handles to pull the bins out. Let's see how long we can keep our kitchen set cleaned!