Monday, January 6, 2014

Project: Lens Cap Drawstring Bag

I had recently made a camera strap cover for a good friend, and although I included pockets, I didn't think to ask how big her lens cap was!  I thought I had enough material to make her another with larger pockets, but when I settled in to do this during the kids nap time today, I saw that I didn't.  I will have to make her another at some point, but until I can get back out to the store to get more supplies, I figured I'd make a temporary "fix" for her so she doesn't misplace that lens cap!  I even remembered to take pictures so that I could share this with you!

Introducing...


First, grab your lens cover!  Next, you'll want a rectangle of fabric that your lens cover will definitely fit in plus at least an inch or more on top to create the area for the ribbon.

For my project, I had 1/8" ribbon on hand, so the chassis for the drawstring didn't need to be too big.  You will want to adjust this to the materials you want to use.

My fabric measured 9" x 5"
My ribbon was 1/8" ribbon and I needed two lengths of it measuring 26" each. This is because they are extra long so my friend can attach them however she wants!  Yours may be shorter if you would like.

Fold the rectangle with right sides facing and matching up the two short ends at the top.

See? Lots of room - the lens cover will definitely fit in this bag!

Now, take the fabric to your sewing machine and stitch up the two sides, leaving about an inch to an inch and a half open at the ends.

Ready to stitch!


Visual for the ends staying un-sewn.
Work with one side at a time.  Take out your iron, and fold in the corners where you didn't sew into nice triangles.  Press with the iron.


Next, fold down the top about 1/4", and press that, too.  

Fold this down about another 1/2" and press.


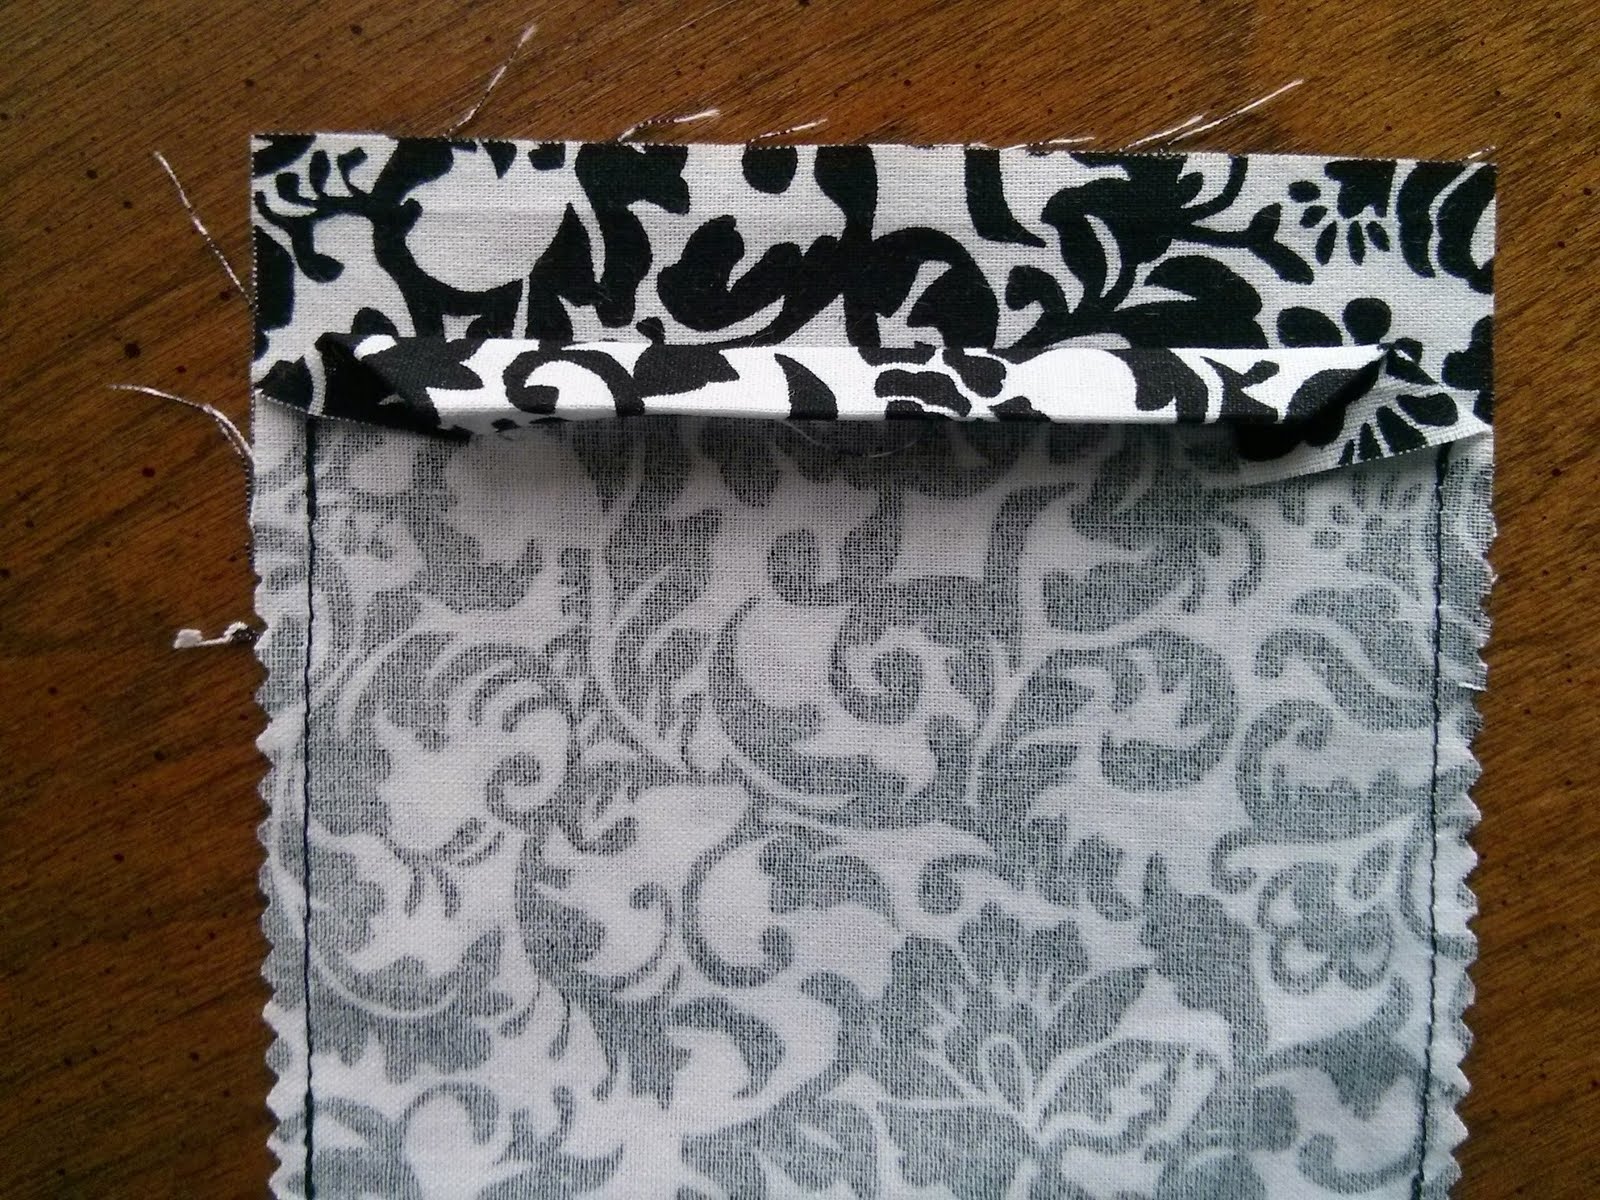
Next you will want to sew this down.  I stitched this from the end all the way to the other end pretty much right at the edge.


Repeat for the other side.

Mine was off a bit and some of the edges were too raw (hey, I was winging it).


So I re-did the side stitches and ran this part through the sewing machine to finish it off so it won't unravel.


Next, turn right side out, and get ready to string your ribbon!


Here is a picture of the fabrics I used in the strap I had already made, and my color choice for ribbon for my little lens cover drawstring bag.


Grab a big tapestry needle and thread the ribbon onto the needle.  Using the needle, pull the ribbon all the way through one chassis, and then around to the other one.  Your loose ends of the ribbon should now be hanging out the same side of the pouch.

  
For the second piece of ribbon, do the same thing, but pull it through the opposite side from the side you just finished.


Once the ribbon is threaded you are all set!


You can knot the ends of the ribbon together, or attach the pouch to whatever you are making this for.

Thanks a bunch!

Friday, January 3, 2014

Catching Up: My Handmade Holiday

I am a very lucky and very happy woman.  My children are all at a very fun stage where they love to pretend, and love to be with me.  The "baby" is running full speed ahead and doing her best to keep up with her brothers.  They require both of my hands all of the time, and most of the time it's extremely rewarding.  Needless to say, posting here has taken a very back seat (like a seat all the way in the back of a very long bus) to everything else that has been needing my attention.

I made super awesome Halloween costumes for all the kiddos, I took a lot of pictures of that process, too, and someday when things really settle down, I will write up that tutorial.  After Halloween finished, my Christmas crafting planning happened, and I am very pleased with all that I was able to accomplish this year without really being stressed out.  I hope you and your families celebrated a wonderful Christmas and New Year.

My kids made out like handmade gift bandits receiving new crocheted hats and mittens, monogrammed floor poufs, Creature Power Suits that resemble Wild Kratts ones, "laptop" bags for their LeapFrog LeapTops. Embroidered fleece shirts and t-shirts, a crocheted sweater, pirate hats and gnome hats, and so many other gifts I did not make to inspire their creativity, imaginations, and minds.  I currently have the messenger bags, pirate hats and gnome hats available for purchase in my Etsy shop.  To make the floor poufs I followed the amazing tutorial from Living with Punks.


I have four beautiful nieces that are very good to me, and they all let me make them awesome homemade gifts too. The younger two of my girls received slipper socks in exactly the colors they wanted.

My oldest niece belongs in the woods and should have been a cowgirl.  She asked for a pair of Cowgirl Slippers (ha!) and I ended up using the Lion Brand Cowboy Booties pattern for inspiration and creating a pair to fit her gigantic size 8 feet.  Don't worry, I wrote this up too, but I didn't take any pictures so you may or may not see a post on these.  She also asked me for an infinity scarf - and since she's on Pinterest, she was able to send me loads of ideas on exactly what she wanted (and didn't want) and I was able to zip one up to be exactly what she wanted.  Lastly, she let me get creative with my new embroidery machine and I monogrammed a pair of boot socks for her.


My second oldest niece had been hinting since August that she wanted a pair of fingerless Cinderella length gloves in royal blue.  For her, I made up a pair of the beautiful Ripple Lace Fingerless Gloves provided by Bethsco Blog in Red Heart Shimmer Royal and she went bananas.  She's full on into the Mortal Instruments this year, so I also had used black felt, and iron on fusible webbing to cut out the shapes of some of the major runes so she can iron these onto whatever she wants.  The last bit of her gift was that I had digitized one of the runes from the books into a file for my embroidery machine, and offered to put it on any article of clothing for her.  She has me put it on a sweatshirt I had picked up for her, and a pair of jeans.  It came out super cute, and totally made my day that she appreciated it.  In fact, I was psyched that all my nieces truly appreciated their gifts this year.


Hooray for handmade holidays!